Adding a Purchase Order
How to Add a Purchase Order
- Find the client, go to claim number, and select “Add PO”


- Enter the PO number from the ACC purchase order, plus PO description, Contract – ie. ISSC or PSYS (start typing and the option will appear below, click into correct option)
- Enter Default start and end dates. For an Early Planning PO, use the end date for the Report code ie. SCPL
- For the SCDNA & SCCL codes, overwrite the start and end dates with the year long dates.
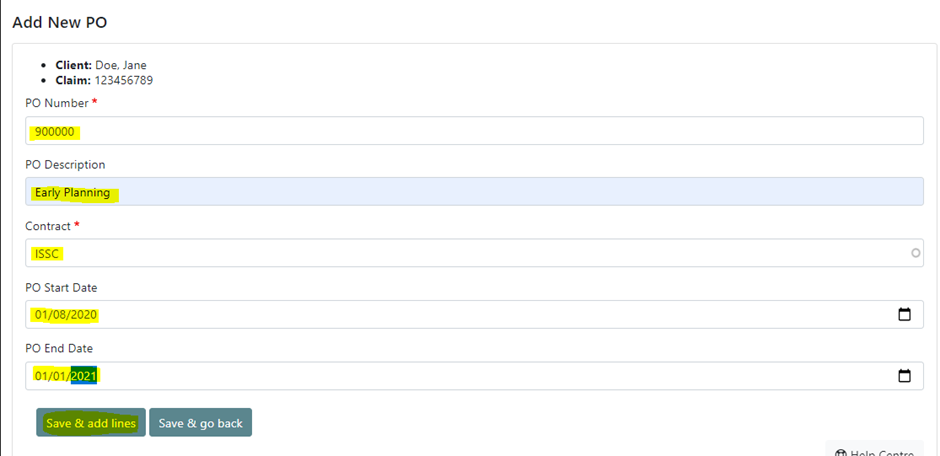

- Save and add lines.
- Enter each line of the PO, choosing the correct level for your provider/PO.
- Add the hours
- After each line, click ADD to enter another line. After final line, click SUBMIT.
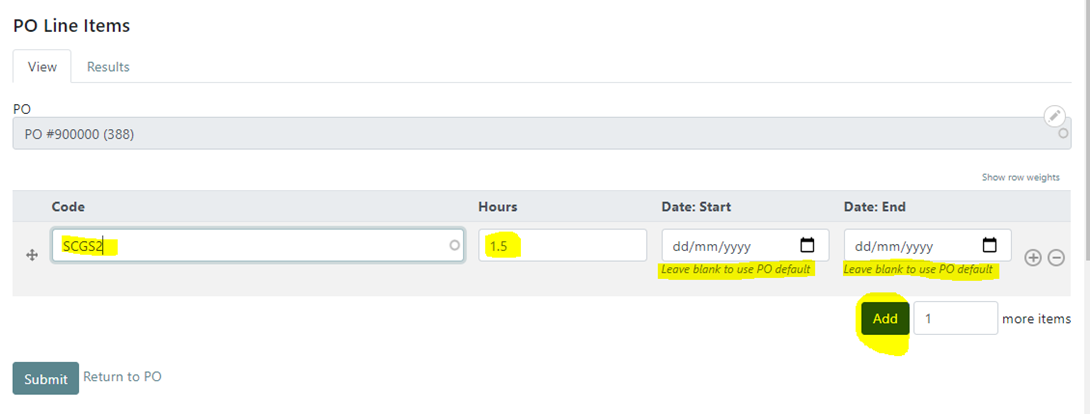

- As above, enter the dates for the lines that do not fit the default – you will need to add the start date as well as the end date. You can freehand the dates or use the calendar.


- Once you have entered all lines, click submit.
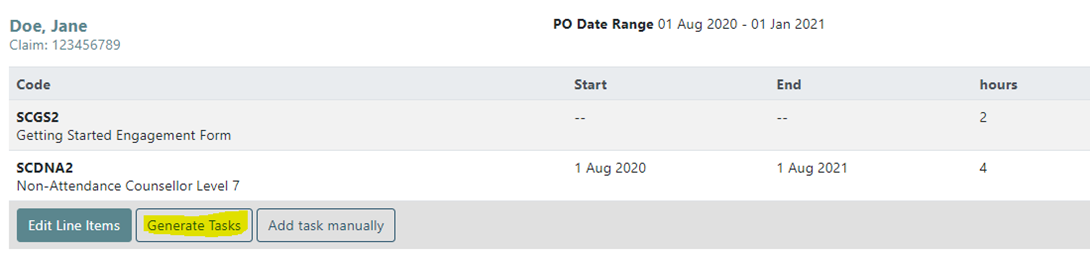
- To add a task (report reminder), click into the PO number, scroll down and click GENERATE TASK.

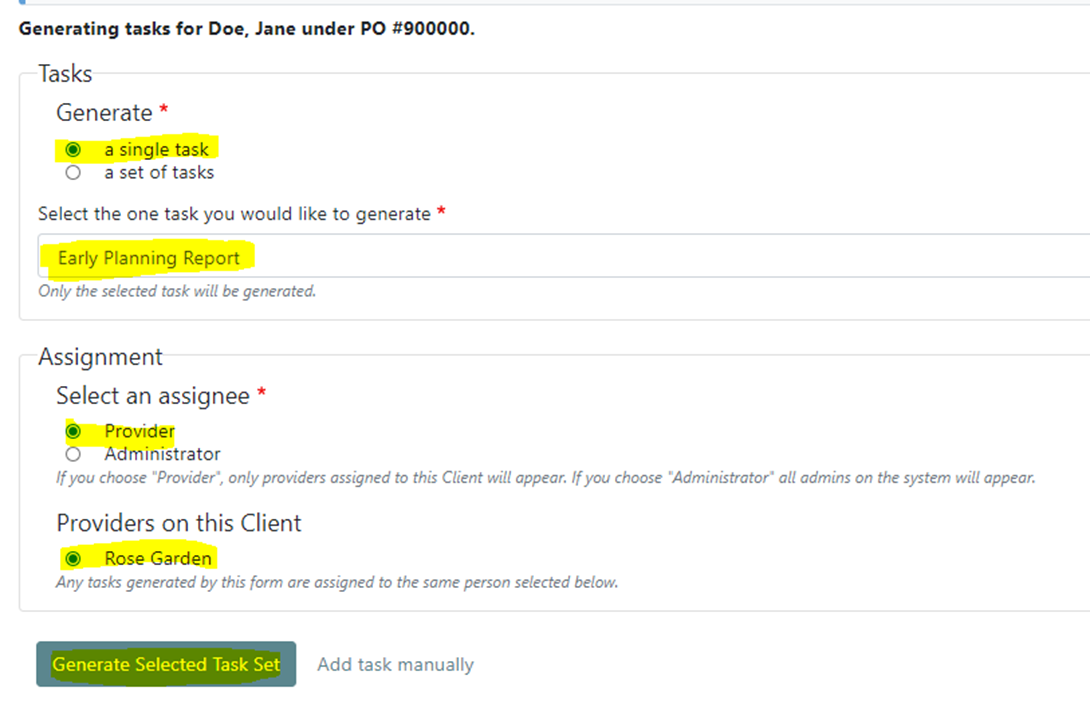
- Fill in the fields using the selections available. If the task is for the Supported Assessment and you have 2 providers working with the client, choose the assessor for the reminder.

If you would like to save a copy of the Purchase Order under the client file, please follow the instructions on ADDING A DOCUMENT
It is helpful to save the emails of PO amendment confirmations in the document section as well, providing a quick point of reference should you need to query unpaids with ACC.